
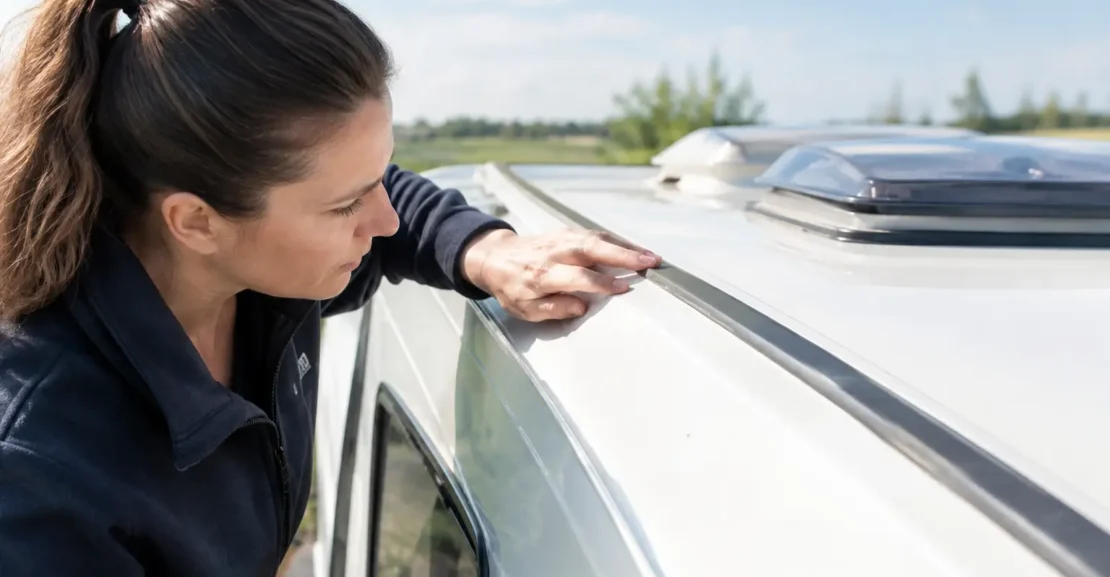
A caravan can look immaculate at ground level while a small break in a roof seal is quietly allowing water into the structure. Taking time to inspect caravan roof seals is one of the simplest ways to protect its value, avoid costly repairs and travel with greater confidence – particularly after a wet New Zealand winter or before a longer trip away.
Roof sealing is not a once-and-done job. UV exposure, vibration on uneven roads, temperature changes and normal movement of the caravan body all affect sealants over time. The good news is that early checks are straightforward, and catching a concern before moisture reaches timber framing or internal linings can save a great deal of trouble.
Why caravan roof seals deserve regular attention
Water ingress is one of the most significant issues a caravan owner can face. It may begin as a fine crack around a roof vent, TV aerial, skylight or roof edge moulding, then work its way beneath the surface with no obvious drip inside. By the time a ceiling stain, soft wall panel or musty smell appears, the repair can be far more involved.
A sound roof seal helps keep rain out, but it also protects against wind-driven water while towing and condensation finding its way into vulnerable joins. On older caravans, or vans that have spent years parked outdoors, inspection becomes even more worthwhile. Age alone does not mean a caravan has problems, but it does mean the condition of its sealing deserves closer attention.
For buyers, roof condition is also a useful indicator of how carefully a caravan has been maintained. A clean roof with tidy, flexible seals and evidence of regular care inspires more confidence than one with neglected fittings and old sealant applied over old sealant.
When to inspect caravan roof seals
A close inspection twice a year is a sensible routine for most owners: once before the main travel season and again after winter. It is also wise to check after a severe storm, after branches have contacted the roof, or when buying a used caravan.
Do not rely only on a quick look from the ground. Many seal issues are too small to see from below. If it is safe to access the roof according to the manufacturer’s instructions, use a stable ladder and have another person nearby. Not every caravan roof is designed to be walked on, so never step onto it unless it is specifically rated for foot traffic. A ladder inspection can reveal plenty without putting you or the roof at risk.
Choose a dry day with good light. Sealant imperfections are easier to identify when the roof is clean and fully dry, and you will be less likely to slip.
What to look for on the roof
Start at the front and work methodically to the rear so no area is missed. Pay particular attention to every point where an accessory or fitting passes through the roof. These are the places most likely to develop leaks.
Check around skylights, hatches, roof vents, air-conditioning units, solar-panel mounts, aerials, satellite fittings and any aftermarket accessories. Then inspect the roof edge trims, front and rear joins, and the seal between the roof and sidewalls.
Look for these warning signs:
- Cracks, splits, pinholes or gaps in sealant
- Sealant that has lifted away from the roof or fitting
- Hard, brittle, chalky or badly discoloured sealant
- Dirt lines or staining that suggest water has tracked beneath a join
- Loose screws, cracked plastic surrounds or damaged roof sheeting
Fresh sealant is usually smooth and well bonded, although its exact appearance varies by product and caravan construction. What matters most is whether it remains continuous and flexible. A small surface mark is not always a leak, but a visible gap at an edge or around a screw deserves action.
Avoid prodding aggressively with a screwdriver or sharp tool. You can create damage where none existed. A gentle press with a gloved finger can help identify sealant that has gone hard or detached, but treat roof surfaces and fittings with care.
Check the inside as well
A roof inspection should always be paired with an internal moisture check. Open overhead lockers and examine ceiling corners, especially below roof fittings. Run your hand lightly over wallboards and ceiling linings to feel for softness, rippling or unusual give.
Look for yellow-brown staining, peeling vinyl, mould, a persistent musty smell or swollen timber around windows and cupboards. These signs do not automatically prove a roof leak – water can enter through windows, corner trims or wall penetrations too – but they warrant proper investigation.
If you are viewing a caravan for purchase, ask whether any water ingress repairs have been completed and request clear details of the work. Honest records are valuable. A professionally repaired issue is not necessarily a reason to walk away, provided the cause was addressed properly and the surrounding structure is sound.
Cleaning seals without causing damage
Keeping the roof clean makes inspection easier, but harsh cleaning products can shorten the life of sealants and roof materials. Use a soft brush or sponge, mild caravan-safe cleaner and plenty of water. Rinse thoroughly so no residue remains around joins.
Pressure washers require caution. A high-pressure stream directed at a seal can force water into a marginal gap or lift the sealant further. If you use one at all, keep the pressure low, stay well back and never aim directly at roof seams, vents or skylight edges.
Do not apply silicone spray, petroleum-based products or random household sealants in an attempt to make seals look better. These can interfere with later repairs and may not adhere correctly to the materials already on the roof.
When cleaning is enough, and when resealing is needed
Surface dirt and mild oxidisation do not automatically require resealing. If the sealant remains flexible, fully adhered and unbroken, a careful clean and continued monitoring may be all that is needed.
Resealing is more appropriate where the seal has cracked, separated, shrunk or begun lifting at an edge. The correct product depends on the caravan’s roof material and the particular fitting being sealed. Some applications need a self-levelling roof sealant, while others need a non-sag product or butyl sealing tape beneath a fitting. Using the wrong product can create a messy repair that fails early.
In many cases, applying new sealant over loose, contaminated or failing material is not a lasting fix. The old sealant may need to be removed carefully, the surface cleaned and prepared, and the fitting resealed properly. This is where professional advice is worth seeking, especially around large skylights, air-conditioning units or solar installations.
A sensible approach for first-time buyers
For anyone considering a pre-owned caravan, roof seals should be part of a broader condition assessment rather than a single pass-or-fail test. A van with tidy, recently maintained seals may still have hidden moisture concerns, while a van with aged sealant may be perfectly dry but due for preventative work.
Ask to inspect the caravan in daylight and take your time. Check the roof fittings, internal ceilings, cupboards and wall junctions. If there is any uncertainty, arrange an independent moisture inspection before committing. It is a small step compared with the cost of repairing structural water damage after purchase.
At RVfinders, a careful walk-through is part of helping buyers make decisions with clear eyes. The right caravan is not simply the one with the best layout or lowest asking price; it is one whose condition, maintenance needs and intended use all make sense for you.
Keep a simple maintenance record
A brief note on your mobile after each inspection can be surprisingly useful. Record the date, what you checked, any area that needs watching and photographs of questionable seals. This helps you spot change over time and gives future buyers evidence of thoughtful ownership.
If you reseal an area, note the product used and the date of the work. Sealants have different service lives depending on exposure and application, so a record takes the guesswork out of future maintenance.
A dry caravan starts with small, regular checks rather than waiting for a visible leak. Give the roof seals a careful look before the next journey, and if something does not look right, deal with it while it is still a manageable job.